The Best Noise Reduction Software for Photographers - A Comprehensive Guide
Noise is one of the biggest problems photographers face when shooting in low-light conditions. Even if you are fortunate enough to be shooting during the golden hours or have access to a private space with controlled light, it is still almost impossible to avoid noise completely.
If you’re a professional photographer or someone who shoots photos on a semi-regular basis, then you’ll know that there are many different noise reduction software programs out there. In fact, you may even already be using one right now! But what exactly is noise? And which software solution is the best for your needs? Let’s take a look…
What is Noise and Why Does it Occur?
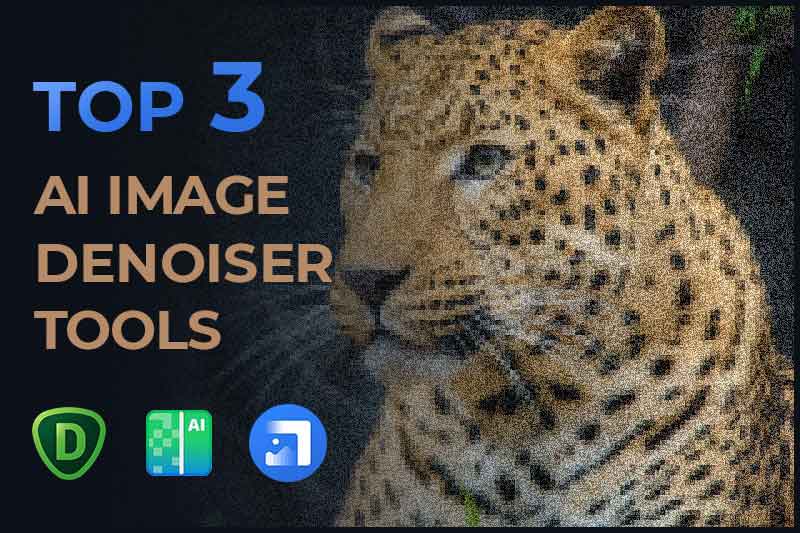
Image noise is a random pattern of colored pixels that appear on an image when it is overexposed. It is most commonly found in photographs with high ISO settings, especially when shooting in low light. Most digital cameras have an upper limit when it comes to the ISO setting, and this upper limit is usually quite high. Therefore, when shooting in low light, you may need to increase the ISO setting to get an adequately exposed image. The problem is that increasing the ISO setting creates more digital noise, which shows up as colored pixels and can ruin an otherwise clean shot.
There are several different types of noise, but the most common types include:
Banding noise - This type of noise is most prominent in areas of uniform color, such as a clear blue sky.
Thermal noise - This type of noise is caused by the random motion of electrons in the sensor of your camera, and is more common in low-end cameras.
Grain noise - This type of noise is similar to film grain, and can be seen in images with high ISO settings.
Chroma noise - This type of noise creates false-colored pixels and is more prominent in areas of high color saturation.
Top 3 Manual Noise Reduction Programs
Alright, so now that we know what noise is and why it occurs, let’s take a look at which noise reduction programs you should use. There are two main types of noise reduction software: AI noise reduction software and manual noise reduction software.
Manual noise reduction software requires more expertise to operate, but can achieve better results for those who know how to use it properly. It is also less expensive than AI noise reduction software.
☛ Adobe Lightroom
Adobe’s flagship photography program is a great option for those who are shooting both indoor and outdoor photos. It can be used as a standalone program or in conjunction with other Adobe software, such as Photoshop.
In Photoshop, you can process the photo noise reduction in Adobe Camera Raw. It uses the same algorithm as Adobe Lightroom, but with the enormous advantage of being able to apply these adjustments in a much more selective way. This makes it an ideal tool for dealing with noisy images. The main way to approach photo noise reduction in Photoshop is Noise Reduction through Adjustment Layers.
☛ Apple Aperture
While Apple Aperture is a great program for photographers, it does have a hefty price tag. If you have a Mac computer and are looking for an all-in-one solution for your photo editing and management needs, then Aperture is a great option for you.
Top 3 AI Noise Reduction Programs
AI noise reduction software is easier to operate and has better effect than manual noise reduction software. It is also suitable for a wider audience. However, it is more expensive than manual noise reduction software.
☛ Topaz DeNoise AI
Topaz DeNoise AI is a noise reduction software that promises to reduce image noise by up to 100 times. Topaz DeNoise AI is available as a standalone application or as a plugin for Adobe Photoshop, Lightroom Classic, and Topaz Studio 2. Topaz DeNoise AI uses artificial intelligence to learn from images and identify patterns in order to remove noise more effectively.
PROS
- Preserves and enhances detail
- Fast processing speed
- Cutting edge noise reduction algorithm
CONS
- High system requirements
- Paid updates after 1 year
- Expensive($79.99 for the standalone version or $49.99 for the plugin version)
☛ ON1 NONOISE AI
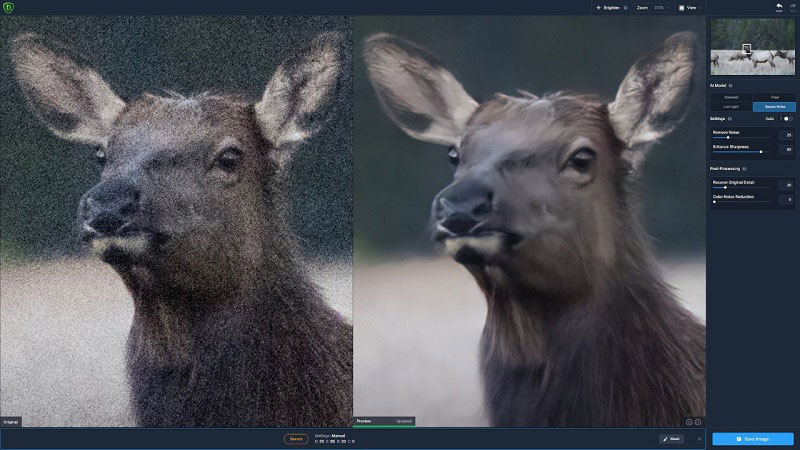
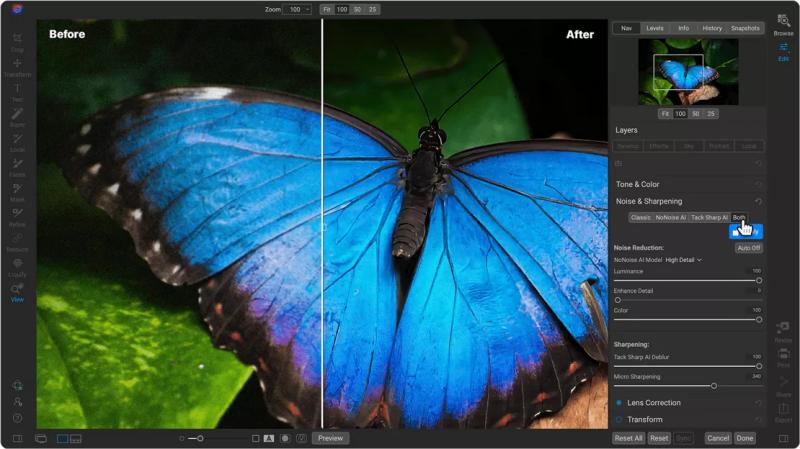
ON1 NONOISE AI is a noise reduction software that uses artificial intelligence to denoise photos. It is the one of the latest addition to this best noise reduction software test. When it comes to removing noise in photographs, ON1 NoNoise AI does a fantastic job. It can quickly remove noise and get the sharpest details in your photos with AI-powered NoNoise AI.
PROS
- Great for improving wildlife and portraits
- Even cheaper ($69.9)
- AI algorithm is great
CONS
- Can be slow sometimes
- Unintuitive interface
- Paid updates after 1 year
- Not perfect for astrophotography noise reduction
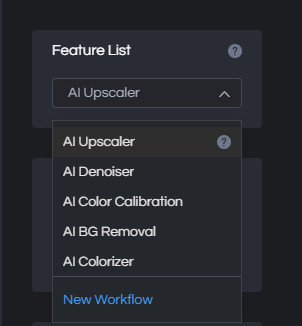
Different from the above two AI products, AVCLabs Photo Enhancer AI is a comprehensive photo enhancement software. For AI Denoiser, AVCLabs utilizes deep-learning-based compression artifacts removal to comprehensively remove compression artifacts, without a serious loss of existing detail. Besides AI Denoiser, it also provides AI Upscaler, AI Color Calibration, AI BG Removal and AI Colorizer to meet users’ different demands. And it also supports face enhancement. That's why we say it's a comprehensive product.
PROS
- Advanced Algorithms
- Multiple subscriptions Plans ($19.95/Month, $79.95/Year, $159.9/Lifetime)
- Multiple AI model options (AI Upscaler, AI Denoiser, AI Color Calibration, AI BG Removal and AI Colorizer)
- Simple and intuitive
CONS
- Can be slow sometimes if you apply the face refinement feature.
- Requirements for computer configuration
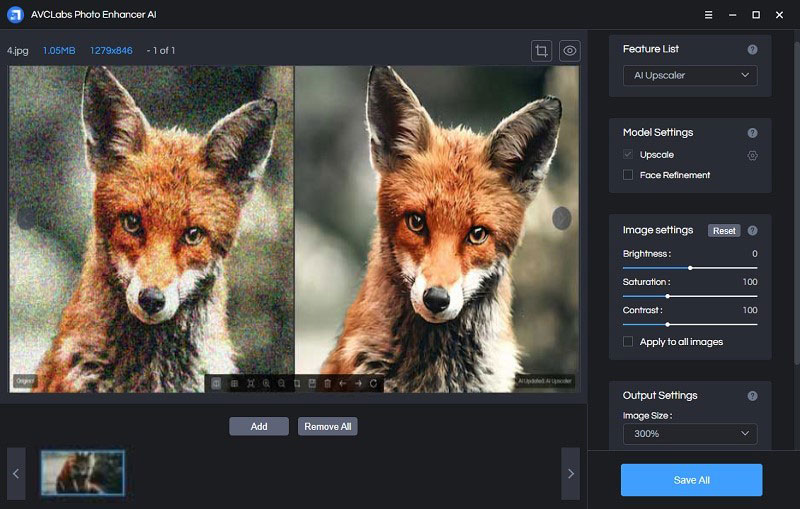
Compare the above three AI Noise Reduction Programs, analyze their respective characteristics and draw conclusions:
If you're impatient, go for photo processing speed and you're willing to spend a lot of money on the program. Topaz will be your first choice.
If you are a wildlife photographer and looking for a cheaper software than Topaz, you can choose ON1 NONOISE AI or AVCLabs Photo Enhancer AI. The difference in processing effect between the two is not big, or AVCLabs is sometimes better. And they all have trial versions. ON1 NONOISE AI provides a 14-day trial period. AVCLabs Photo Enhancer AI does not limit the number of trial days and times, but the denoised pictures will have a watermark.
Finally, in terms of product cost performance, processing effect, and product functions. The best noise reduction software I would recommend is AVClabs Photo Enhancer AI. As three excellent AI Noise Reduction Programs, their noise reduction performance is very good. The main reasons for recommending AVCLabs Photo Enhancer AI are as follows:
1. AVCLabs Photo Enhancer AI is a comprehensive photo enhancement tool, which means it has more features than ON1 NONOISE AI and Topaz DeNoise AI. This is more friendly for users who like photography and post-upscale pictures, because they can choose different AI models according to different pictures to get better results.
2. A variety of subscription plans are available for users to choose from, which is more flexible. In this way, short-term users of 1-2 months can choose to subscribe on a monthly basis to avoid wasting money.
3. The main interface of the program is the most concise among the above three AI Denoise programs, which is easier for novice users to operate.
AVCLabs Photo Enhancer AI
Automatically remove noise/grain from images
Upscale the image resolution without losing quality
Make the blurred, low-quality photos to high-definition
Multiple AI model options to meet different demands
3 Choices for Your Order Plan
All works are done in one-click to save your time for more creative tasks
Steps to Denoise Photo with AVCLabs Photo Enhancer AI:
Download an install the AVCLabs Photo Enhancer AI.
It provides both Windows and Mac version. Download the version compatible with your computer and launch it.
Import the noisy image to the program.
You can drag and drop the photo to the program main window to open it in the program and you can also click the "Browse" button to explore and open the photo in the program.
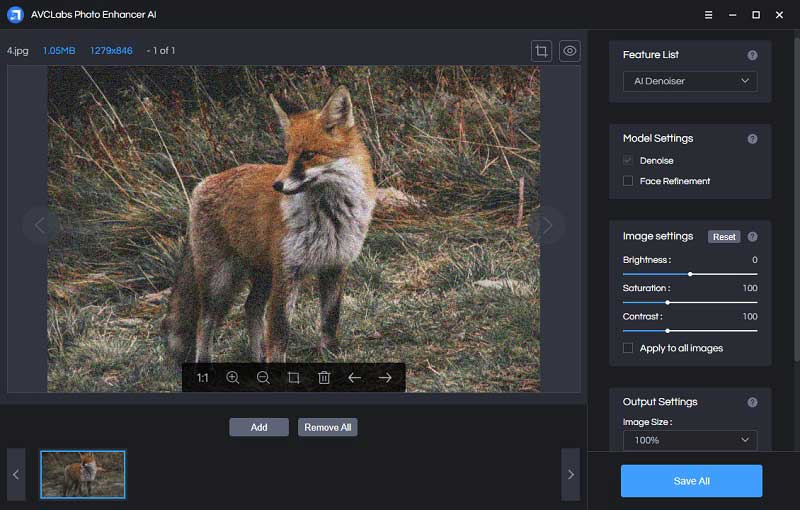
Choose the AI model.
On the right panel of AVCLabs Photo Enhancer AI, you can choose the "AI Denoiser" by choosing from the Feature list.
Set output file.
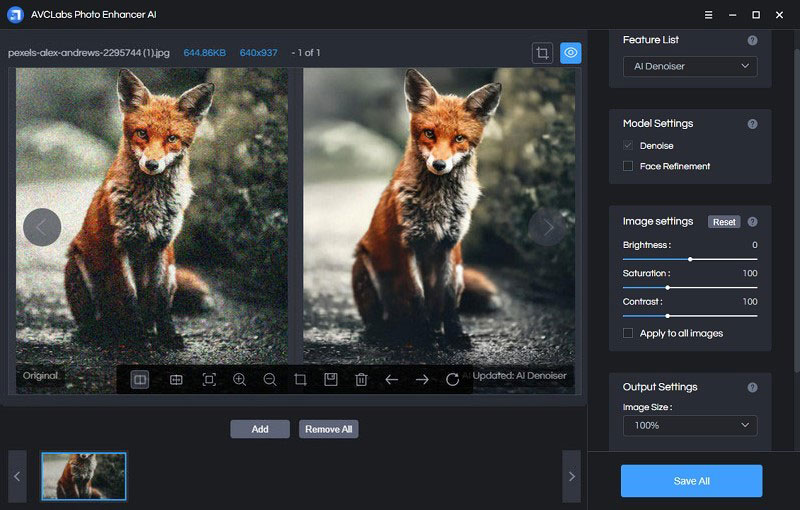
Set the output image site to 200%, 300%, or 400%. Also set the output image format as png, jpg, jpeg or bmp. At last, choose a folder to store the upscaled photo.

Preview AI Denoiser effect and save the image
When all settings are done, you can click the “Preview” button to view the result. If you are satisfied with the result, click the “Save All” button to save the upscaled photo to your defined folder.
Noise Reduction Tools and Techniques
Now that we know which noise reduction programs are best, let’s take a look at some noise reduction tools and techniques that can help reduce noise in your photos.
1. Check your camera settings before taking photos
First and foremost, when taking photos in low light it’s important to stay on top of your camera’s settings. If you don’t know what ISO, aperture and shutter speed are, or the difference between them, you’ll be at a disadvantage when trying to combat noise. So please always take time to make sure you have the correct settings on your camera based on where you’re shooting and what you’re shooting.
2. Always use the tripod
Using a tripod is a great way to keep digital noise away from your pictures. The tripod will ensure that the frames you take are completely still, which is the best way to combat noise. When shooting in low light, always make sure to use a tripod. A tripod will ensure that your camera remains completely still, which will result in much cleaner images.
3. Choose the right place and light to take photos
If you are shooting outside, try to find a nice shaded area to shoot in. When shooting outside, you should always try to avoid shooting in direct sunlight. If you are shooting in low-light conditions, try to avoid over-exposing your image. If you are shooting in RAW, it is best to expose for the shadows. Always try to minimize the use of strong lighting sources. Strong lighting, such as sunlight and studio lighting, will create a ton of noise in your images.
4. Check your shutter speed and ISO setting
Your shutter speed will be slower when using a tripod. When shooting with longer shutter speeds, you should always try to keep your ISO as low as possible. Shooting at a high ISO setting is known to cause the most noise in a photograph, so try to keep your ISO as low as you can.
Conclusion:
Noise reduction is most often used for improving the sharpness and clarity of a photo. When you reduce noise in an image, you also increase the contrast and color saturation.
To combat noise, photographers can use different kinds of noise reduction software to help clean up the images. If you're looking to improve an image's clarity and remove grain, then you can use Noise Reduction tools found in image processing software like Adobe Photoshop. But if you have a lot of noise in a photo, then you should consider using an AI program like AVCLabs Photo Enhancer AI.
There are a ton of different programs out there, so make sure to do your research to find the best one for you. We hope that this article has helped you better understand what noise is and how it can be reduced. Now, go out there and edit some clean and crisp photos!


